

Building your prospect database is a key step in getting your Pardot marketing automation campaigns ready. In order to understand how to build a prospect database, you must first know what a prospect and visitor is.

Download our expert-created guide to begin your journey with Pardot.
Visitor vs. Prospect
Visitor: Someone who has visited your site who you do not have an email for. Pardot only has the IP address of the device they were using when they visited your site.
Prospect: A visitor who has provided you with an email via form submission or who previously provided their email and is included in a data import.
Visitor
A visitor is someone who has visited your website and had a Pardot cookie placed on them. Pardot only records the IP address of the device the visitor was using when they visited your site.
The visitor record is where you can get insight on your webpage traffic. Use the visitor record to:
- See how many new visitors are coming to your site today/yesterday/past week
- View the number of page views per day/week
- See the individual web visitors with an IP address
- Create/associate a visitor with an email address
Prospect
A prospect is a visitor you have an email address for. They must provide you with their email address either through a lead capture form or data import. If you are already familiar with Salesforce terminology, then you will know that leads/contacts are two different databases in the Salesforce CRM.

However, leads and contacts are both considered prospects and are mapped from the CRM accordingly in Pardot.
Please note that Pardot’s cost is determined by how many mailable prospect records you have in your database. Web visitors and unsubscribed/deleted records do not count towards your contact block.
Building your database in Pardot
Now that you understand the differences between visitors and prospects, let’s dive into how to build a prospect database.
There are four ways to input prospects into your Pardot database:
- Web visitor fills out a form or form handler on your Pardot landing page
- User manually creates a prospect
- User imports data using a CSV or supported Excel file
- Sync through CRM or external database using an API
Visitor fills out
a form
With the Pardot tracking code installed on your site, any website visitor who fills out a form or form handler with their email will be automatically pushed into Pardot as a prospect. (Adding these forms is easy and will be explained in a later chapter of this guide.)
Common reasons for a visitor to fill out a form:
- Download a whitepaper
- Demo request
- “Contact us” form
- Subscribe to a newsletter
User manually creates
a prospect
For one-off situations, you can manually add a prospect to your database.
To do this you will need:
- A campaign name
- Profile type
- Pardot score (you will learn about Pardot score in Chapter 7)
Import prospects using a CSV
or Excel file
The next option is to import your prospects via CSV or Excel file. To do this, you must have a CSV (Excel) document with a list of emails at minimum. The purpose of importing prospects is to pull any contact or lead information you may have from other sources and import them into Pardot. If you are importing a list from Salesforce, you will want to make sure that you include the Salesforce lead or contact ID.
Although the prospect’s email address is the only requirement, other helpful information you can use to further segment your list include: first/last name, job title, company name, industry, etc.
Other sources may include:
- External databases
- Trade shows
- Lists
Steps to importing prospects via CSV:
- Select unique identifier/upload list
- Map fields
- Select campaign and tags
- Select action > Select lists
- Confirm and Save
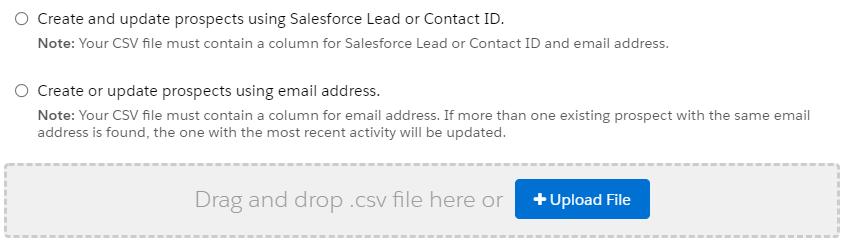
1. Unique identifier/Upload list
When importing a list, you need to first have your Excel file that includes your prospect information in a .csv format. After uploading the list using the ” +upload file” button, you will be required to check the compliance box before you can start mapping out fields.
2. Map Fields
Once you have uploaded your CSV file, double-check to make sure the columns/rows are mapped correctly. Assuming you labeled your header row/columns correctly, Pardot should know where the Pardot fields need to be mapped to.
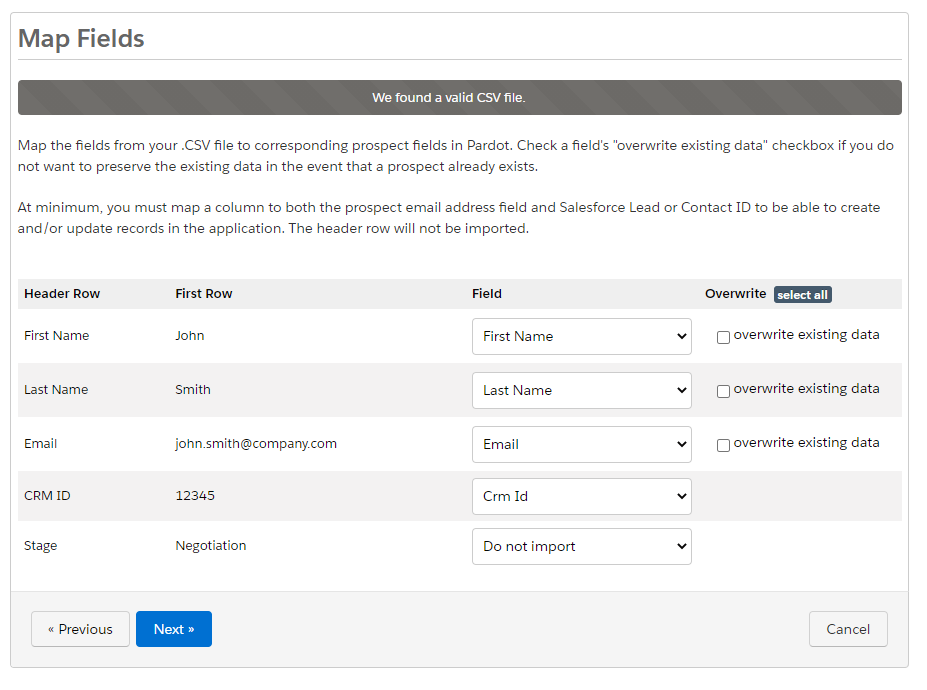
There are three things to check:
- Header row: These are the labels of the columns in your spreadsheet. Make sure Pardot recognizes them correctly
- First row: This is the first row of prospect data in your spreadsheet. Make sure Pardot is pulling in the data that matches the labels in your header row (column labels)
- Field: Field is the Pardot default/custom fields the prospect information from your spreadsheet will be pulled into. They should match the labels in your header row.
There is also a “do not import” option in the “field” drop-down in case you don’t want to import every field in your spreadsheet.
3. Select the Campaign and Tags
Campaign: After you check to make sure the fields are mapped correctly, associate the list with a specific campaign. The campaign name should tell you where the prospects came from.
For example, if you got the list of prospects from the ABC Trade Show, then the campaign name would be “ABC Trade Show.”
Next, there are two checkboxes:
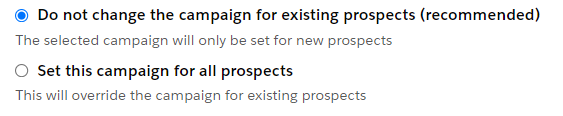
- Do not change the campaign for existing prospects.
If there are prospects on your import list that already exist in your Pardot database, their campaign name/tags will not be overwritten. This is the default and recommended option. - Set this campaign for all prospects.
Use this option if you want to overwrite the campaign/tags of prospects in your database that are also on the list you’re importing. (not recommended)
Tags: Tags are not always necessary but are helpful to give more information on how the prospect was found.
For example, let’s say this list is from the 2018 ABC Trade Show and you already have prospects in your database from the 2017 ABC Trade Show.
Insert tag “2018 ABC Trade Show” so you not only know what campaign they came from, but also what year/event they came from.
4. Select Action
Next, you will choose what happens to the prospects on your list.
There are four options:
- Import and add to list(s): This will create step 4a: “Select Lists,” where you will choose the lists the prospects will be added to.
- Import and remove from list(s): This will create step 4a: “Select Lists,” where you will choose the lists the prospects will be removed from.
- Import and global opt-out: This makes the prospects on your list unmailable. Use this option if you’re importing a list of prospects that have opted out from receiving your emails.
- Import only: This will only import your prospects to your database and will not add/remove them from any lists.
Sync through CRM
The last way to import prospects into Pardot is by syncing them through Salesforce CRM. When the two are integrated, they speak to each other and can update their databases automatically.
Some lead and contact activities in Salesforce trigger a sync from the CRM to Pardot’s prospect database for existing prospects, such as:
- Activities that update the last modified timestamp triggers a sync to Pardot
- Updating a lead or contact email address
- Updating the assigned user (owner) for the lead or contact record
- Making field changes to a lead or contact record
Although changes to current leads/contacts/prospects automatically sync by default, new leads and contacts created within Salesforce won’t automatically be sent over to Pardot as prospects.
There are 3 ways to import new leads and contacts from Salesforce into prospects in Pardot:
- Click the “send to Pardot” button in Salesforce on the lead or contact’s record
- Manually upload the lead or contact’s email address into Pardot
- Enable the option to “automatically create prospects if they are created as a lead or contact in Salesforce.com”
Conclusion
Pardot can technically sync with almost any field or custom object, but you usually don’t need to sync them all. Only sync the custom fields that are vital to your B2B marketing efforts.
In this next chapter, we will break down the different types of prospect lists you can create within Pardot.

